Tying a Leisenring Spider
A basic flymph pattern with modern technique
The Leisenring Spider is the quintessential flymph pattern. The pattern can be found most easily in the Sports Illustrated Book of Wet-Fly Fishing where Pete Hidy notes " is a good fly throughout the season, and particularly deadly when using the Leisenring Lift". It is a simple pattern which utilizes primrose silk, partridge hackle, hare dubbing and a gold wire rib.
Note that this modern method is my own. I didn't come up with the idea, but this is how I construct most flymphs for my personal use.
The traditional method differed only in attaching the thread and the dubbed body was pre-made on separate ropes and stored for later use. To see a tutorial on how to pre-construct a dubbing rope using a Clark's Dubbing Block click the button below.
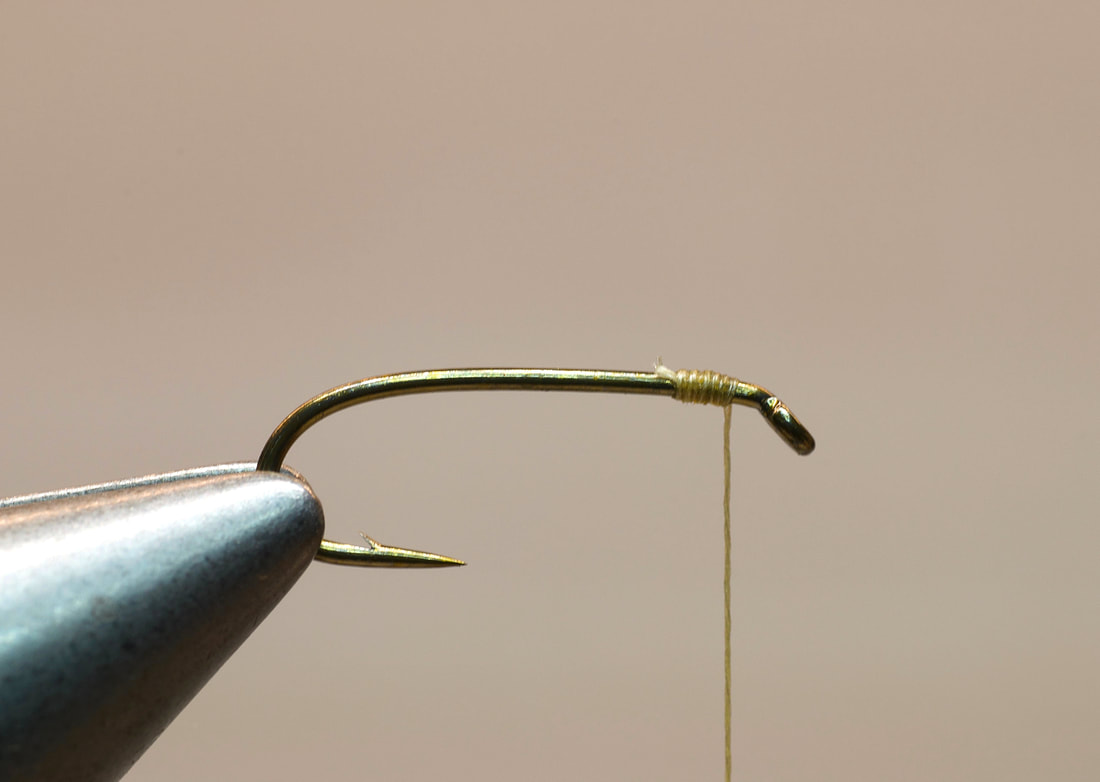
1. Wax your silk thread. Waxing your thread has the purpose of providing for a durable tie. Waxed thread grabs the material better while tying and cements the entire fly once the wax has cured. Initiate the thread on the hook near the front. Take few wraps back and then forward again to attach the thread. For more in depth instruction see "Attaching Thread to the Hook" in my archives HERE.
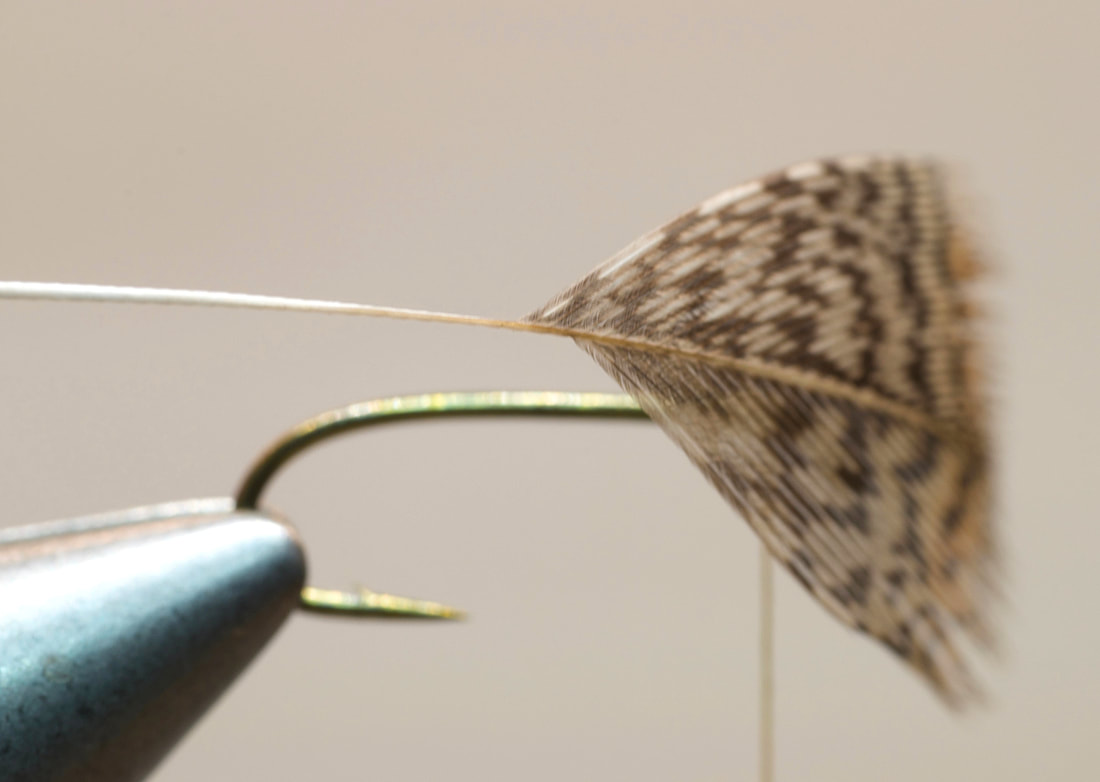
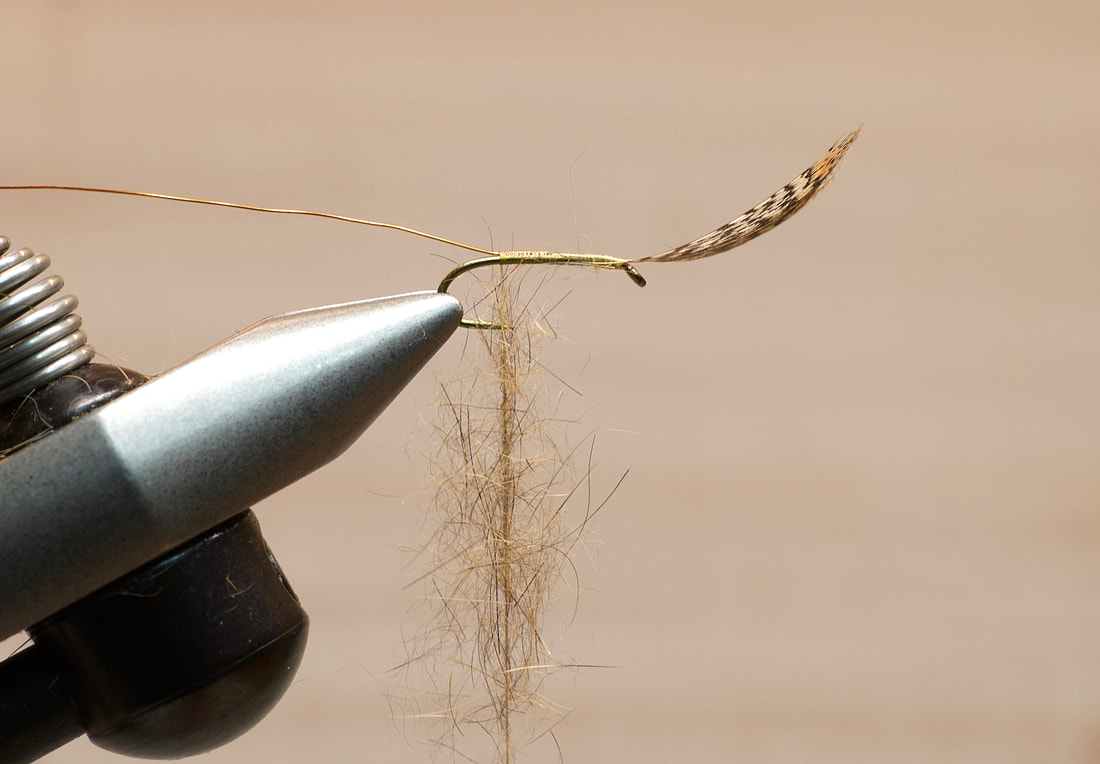
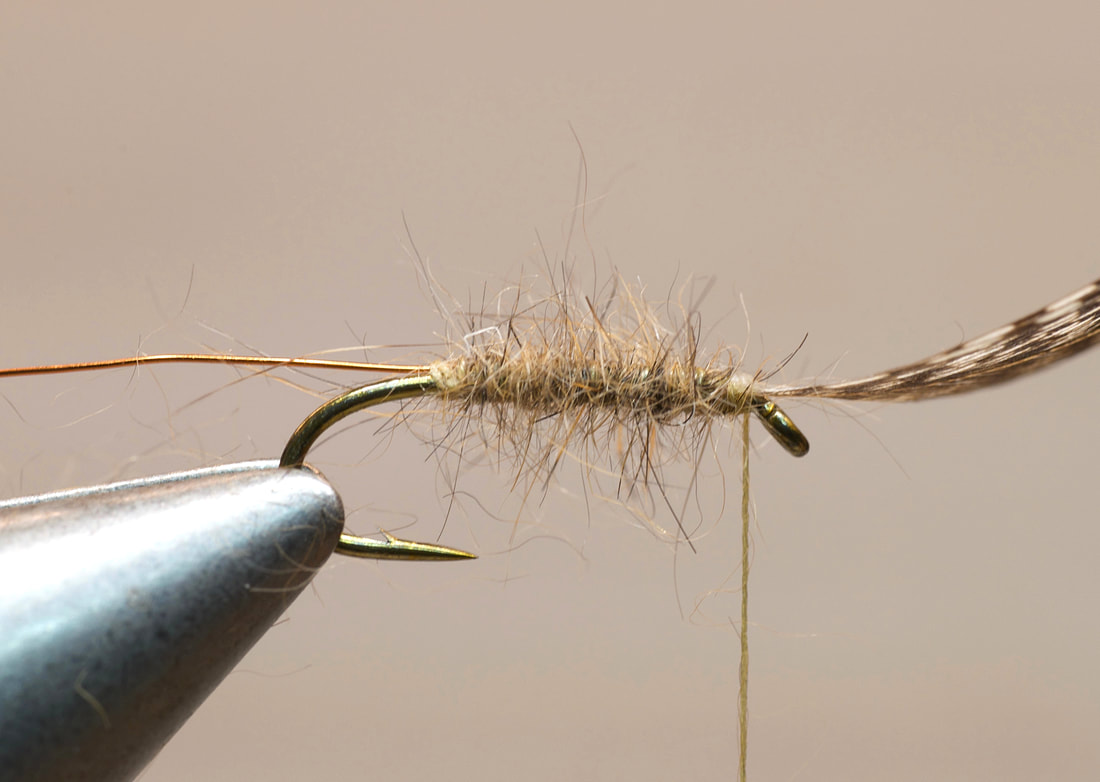
2. Prepare a partridge hackle feather by removing the "fluff" and stripping off fibers as shown. Note that I have taken a few more fibers from the stem on the right side of the feather when looking at the outside (convex) of the feather.
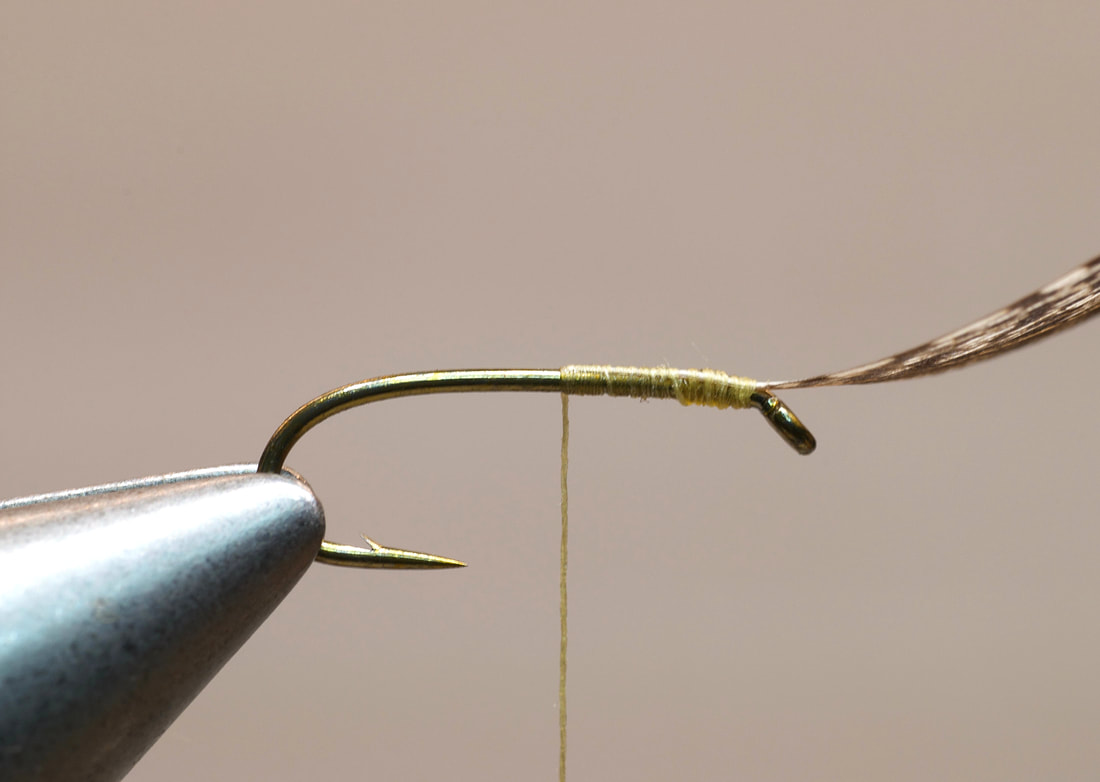
3. Attach the hackle by the stem along the top of the hook with the concave (bottom) side up. Move your thread rearward tying down the stem along the way and stop about mid-shank. Trim butt end of stem off.

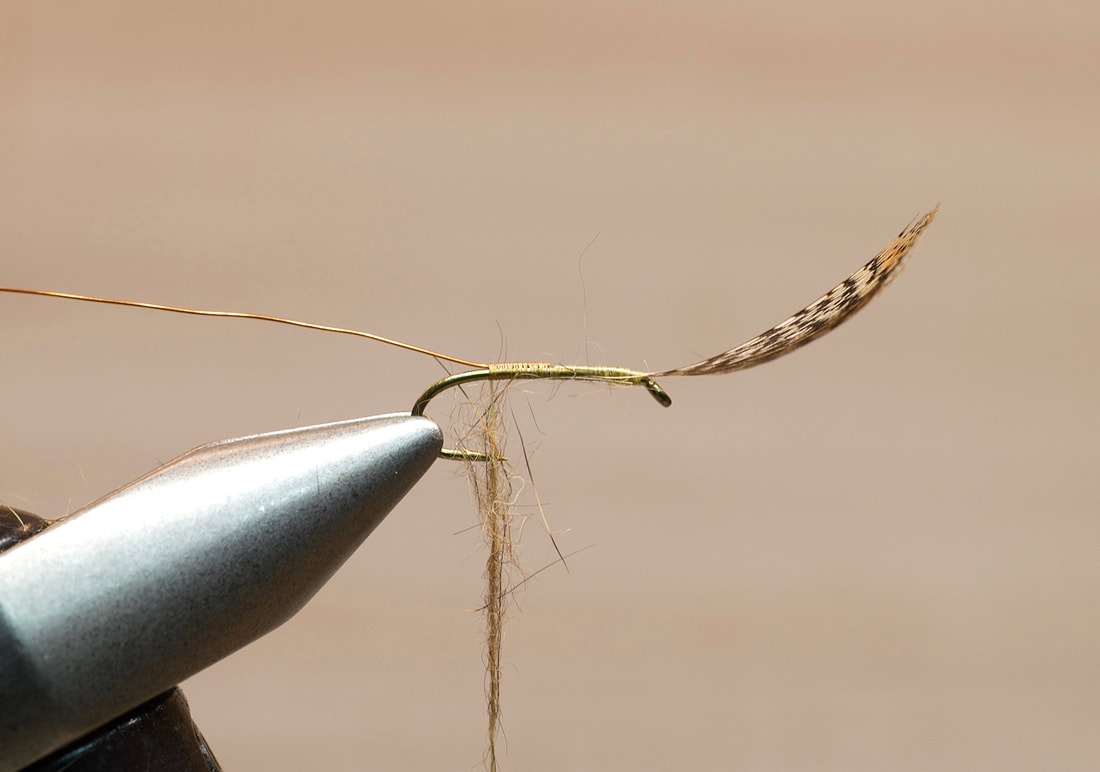
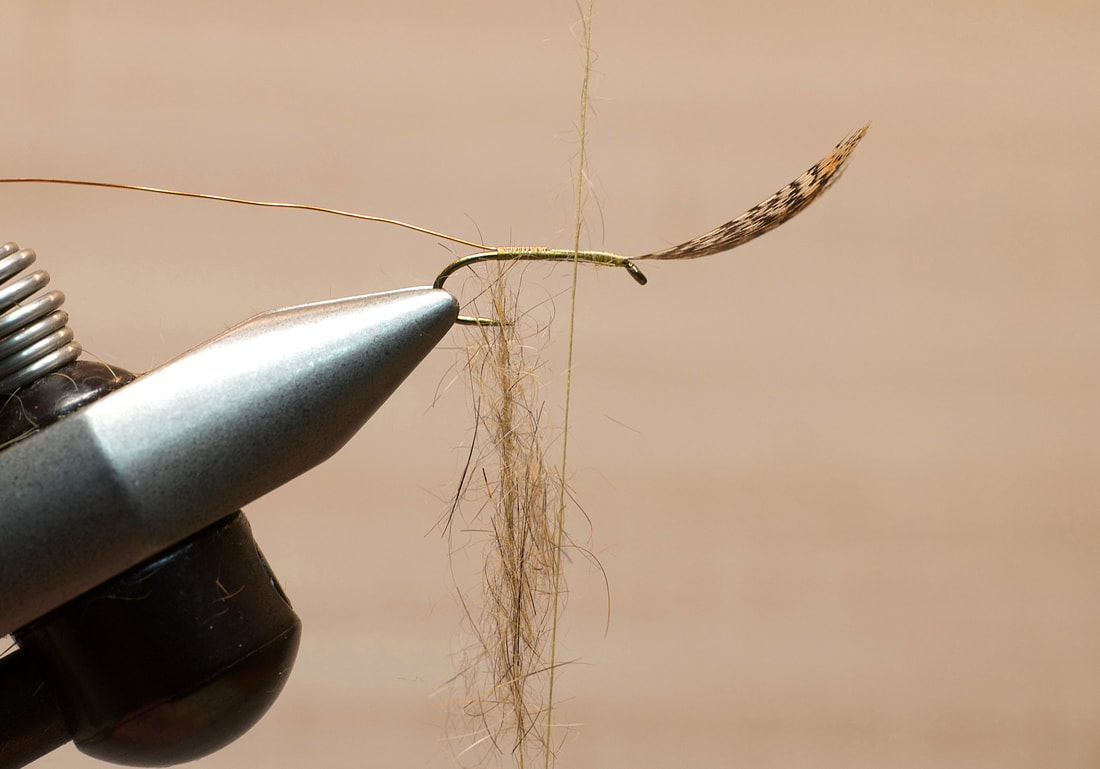
4. Attach fine wire to to the hook where the feather stem ended. Continue to move your thread rearward tying down the wire as you go. Stop your thread at a point between the hook point and the barb.
5. Roll a small amount of hare dubbing onto the thread in the traditional method with your thumb and pointer finger. Not too tight.
6. Take some more hare (about 2x what you had in the previous step) and form it into a flat carpet or net shape. Pinch this piece onto the thread overlapping the bottom half of the previous dubbed hare from step 5. Don't roll this on with your fingers, just pinch it on to keep it flat. How much dubbing? Just enough to cover the thread but not so much that you can't see the thread color through the dubbing.
7. Using your finger, dubbing hook or dubbing twister anchor the thread about an inch below the dubbed portion. Bring the bare end of the thread up so that it traps the dubbing between the two strands.
8. Take the bare end of the thread once around the hook shank just in front of the dubbed end then wrap forward stopping just behind the hook eye. You have essentially created a loop of thread with the hare dubbing trapped between.

9. Using your fingers or a tool, twist the dubbing loop loosely. Practice will let you know when you have it just right. What you are looking for is a controlled mess where the hair tapers narrow at top to full in the center to narrow again at the bottom after being twisted. This taper is important. When wrapped forward this taper will give the flymph body the "cigar" shape that you are after.
10. Wrap the twisted dubbing loop forward stopping about a hook eye's distance from the front. Note that one of the signature features of a flymph is being able to see some of the bare thread at the rear end of the fly.
11. Take your working end of thread and with just a couple tight wraps tie down the dubbing loop and trim the tag end. Don't take too many wraps of the thread. Just a couple wraps of the waxed working thread will secure the material.
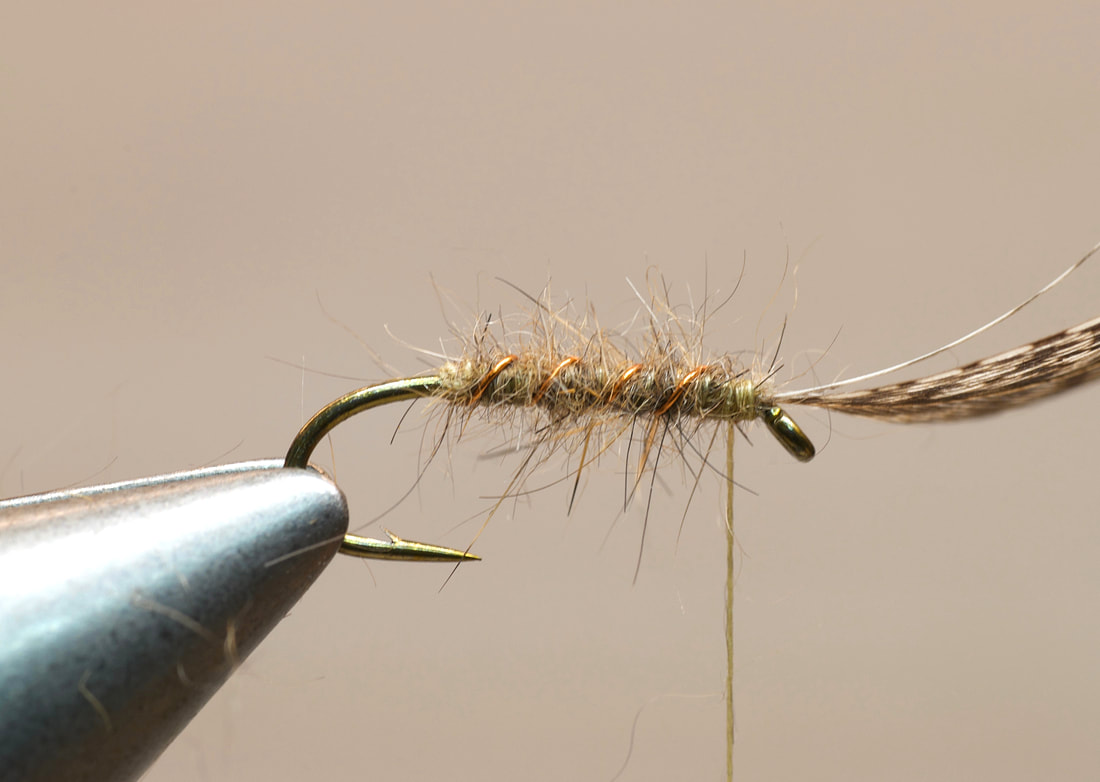
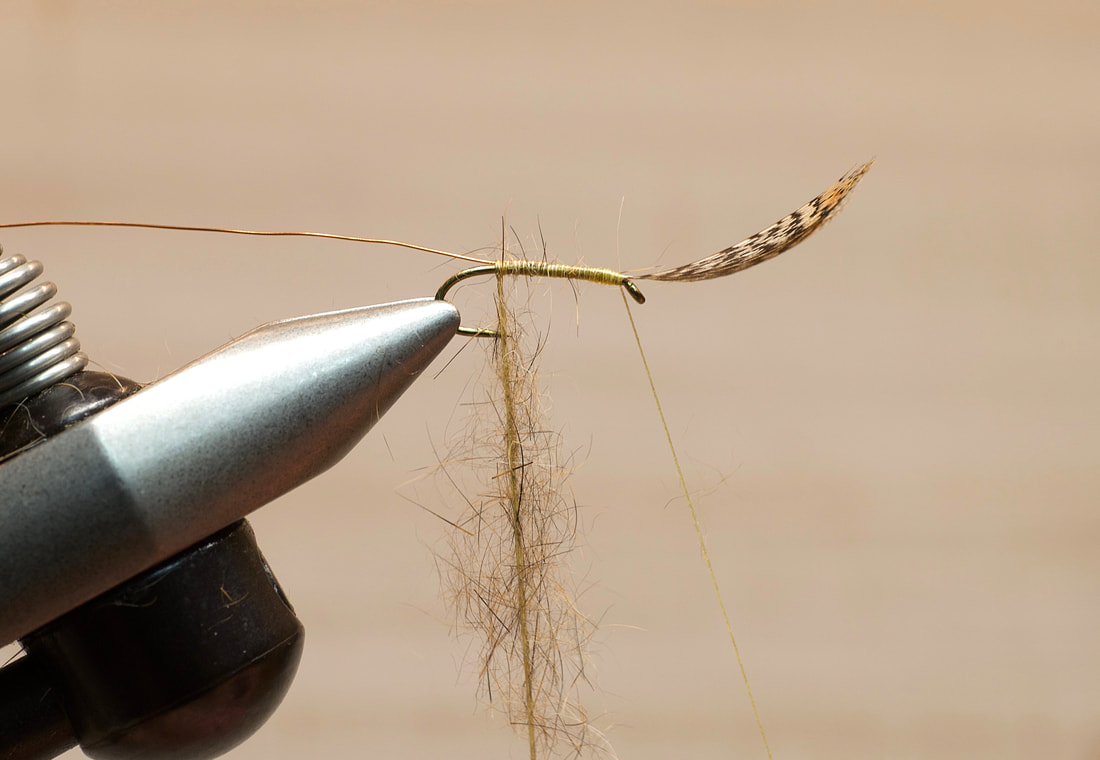
12. Tightly wind the wire ribbing forward. Secure it with a couple wraps of thread. End your thread just a few wraps behind the base of the partridge hackle stem.
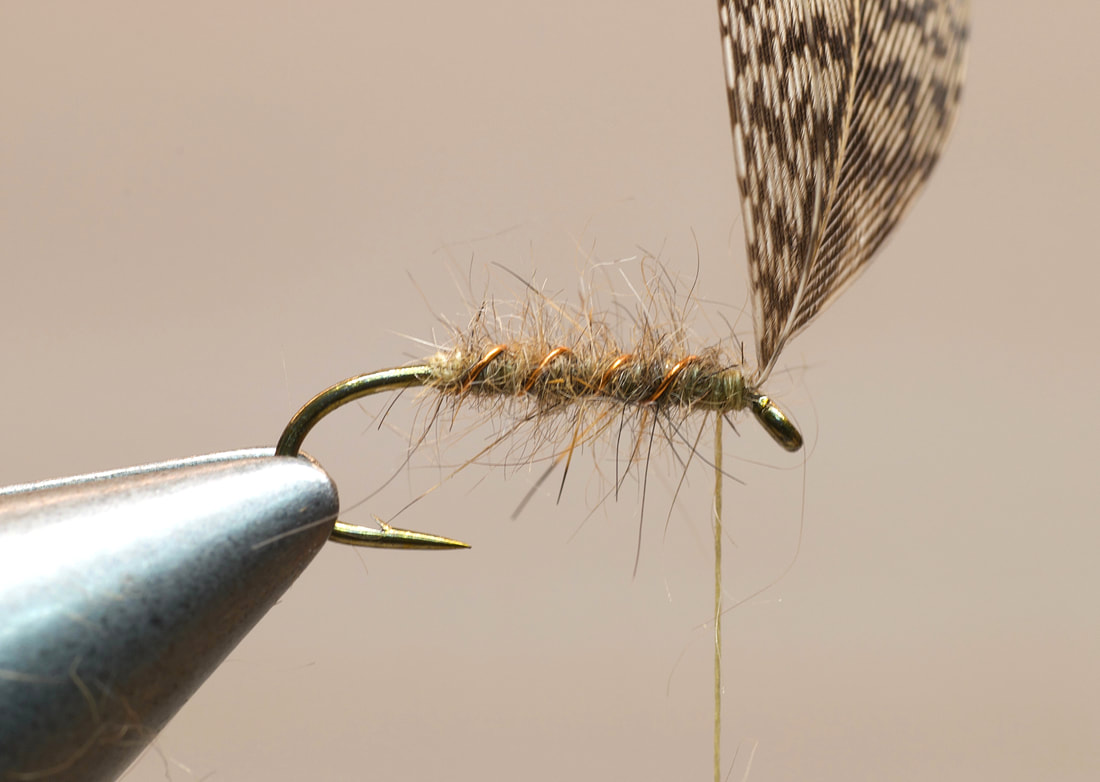
13. With your thumb, prop up the partridge hackle 90 degrees to the hook shank. A small but important step as it will greatly help the hackle to wind correctly.
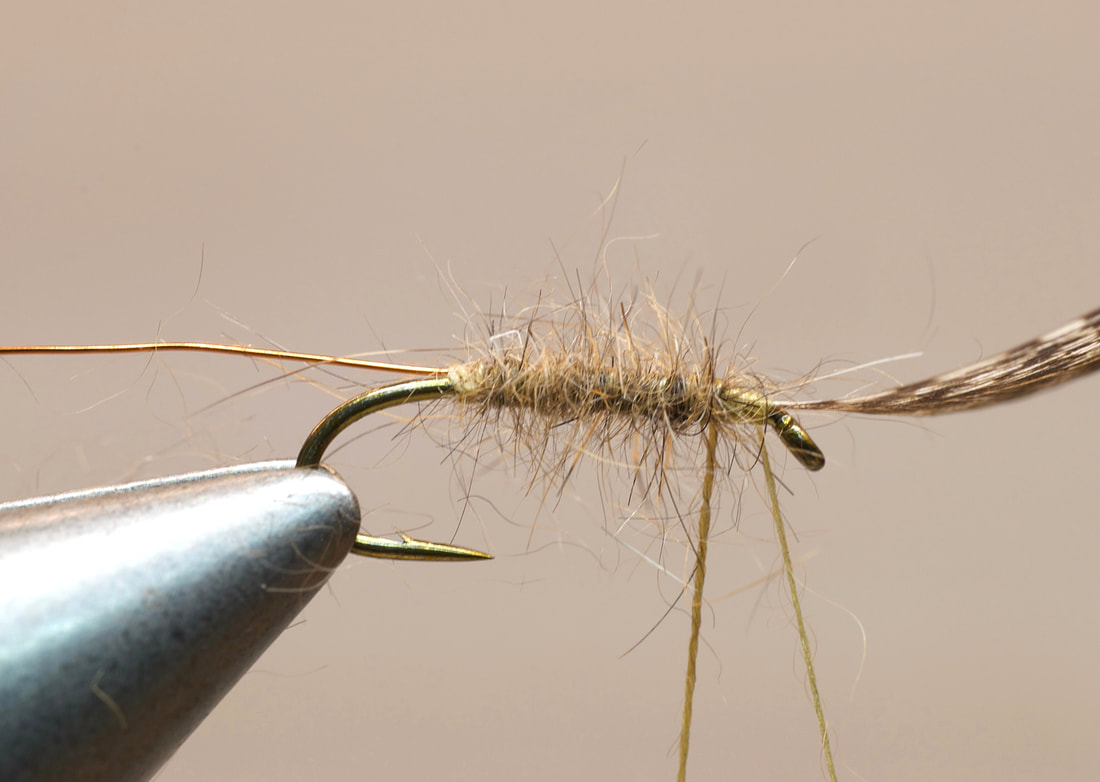
14. Wind the hackle rearward stopping at the top just in front of your working thread. Don't try to wind the hackle too tight. You will probably get about 2-3 wraps of hackle. Secure the hackle tip with 1-2 wraps of thread.
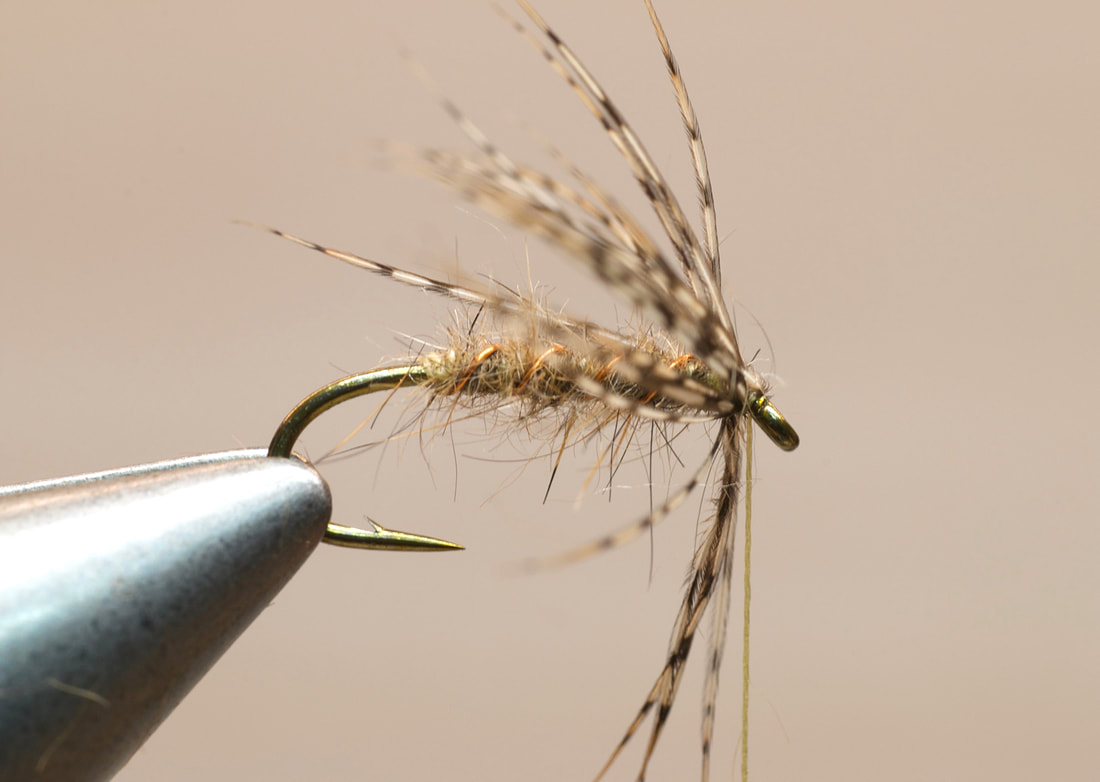
15. After securing the hackle tip, make 2-3 wraps of thread forward through the hackle stopping just behind the hook eye. attaching and wrapping the hackle in this manner makes for a very durable hackle. You have essentially counter wrapped the hackle with the working thread.
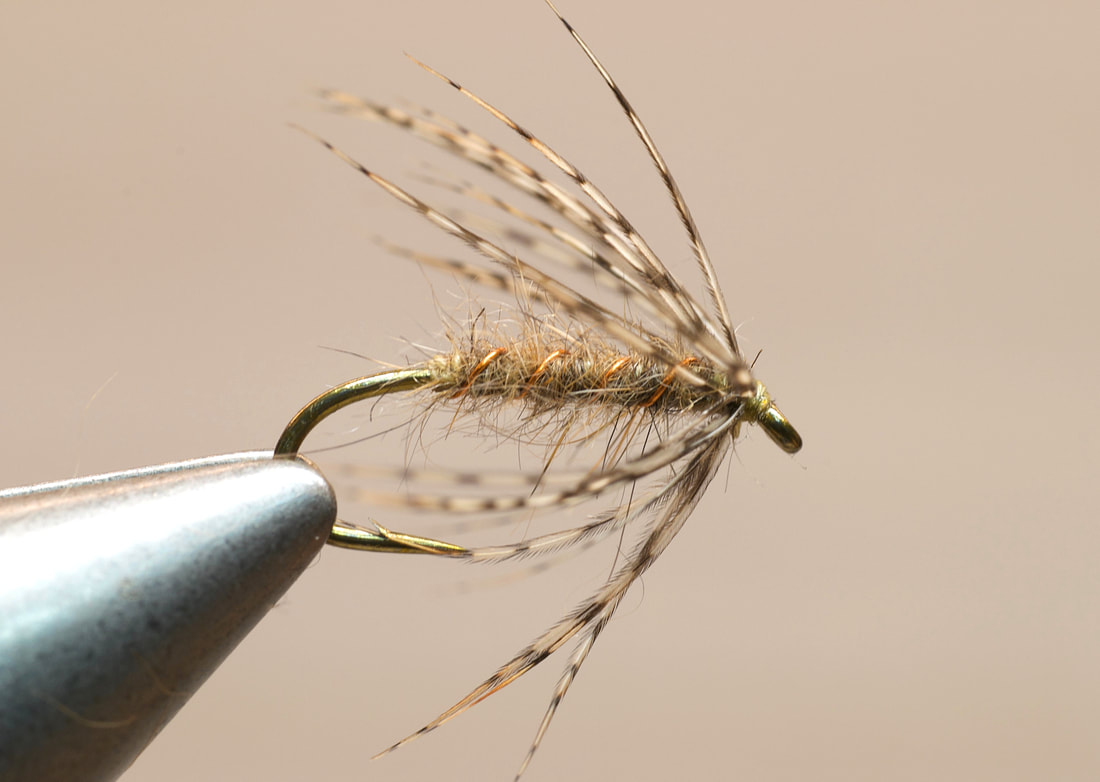
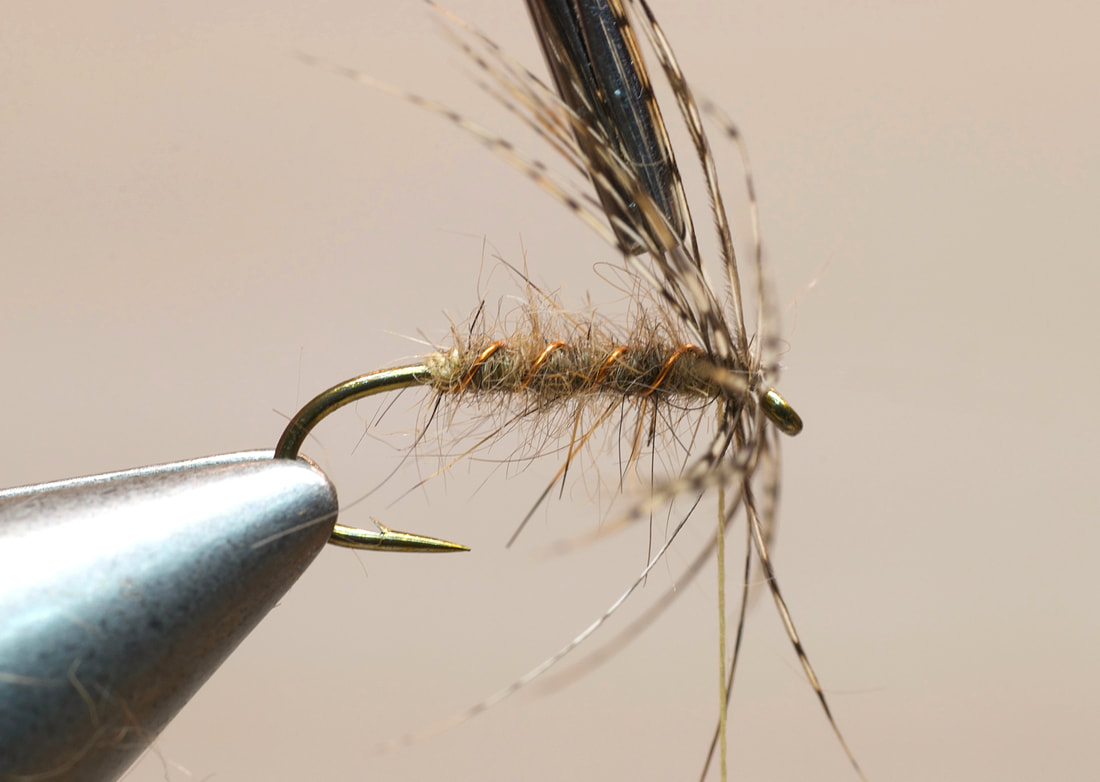
16. Whip finish the head setting the hackle fiber slightly back. Tie off neatly.
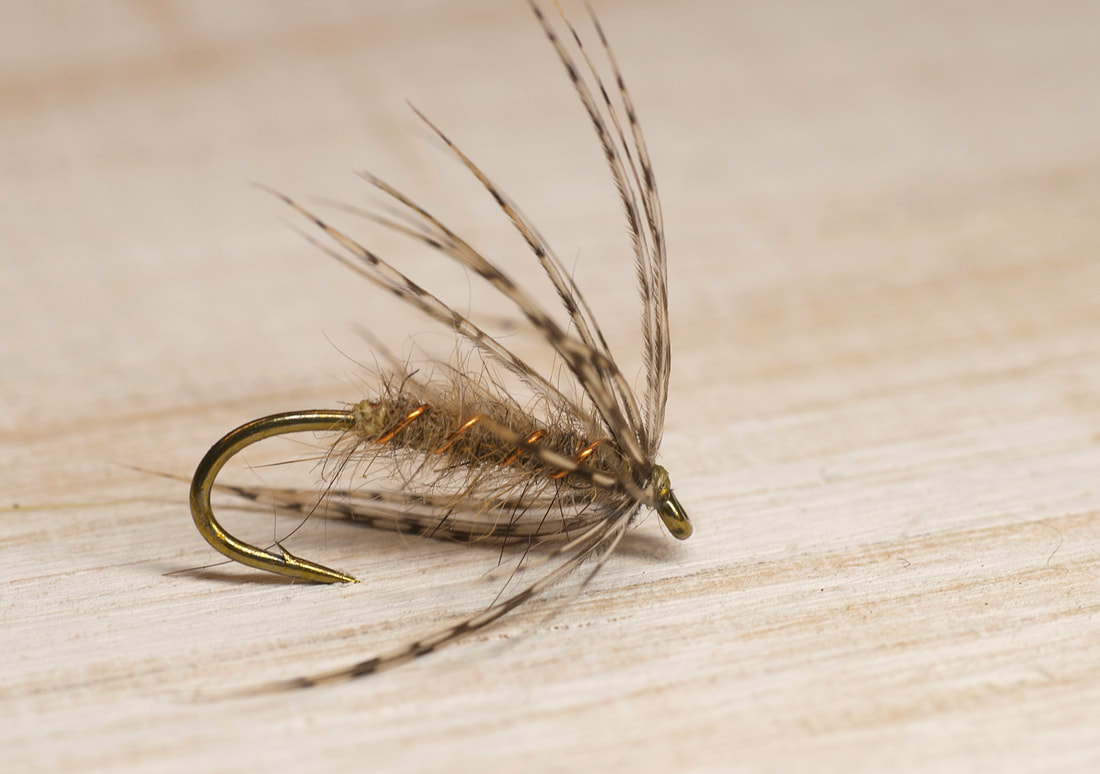
Tied correctly, the finished flymph is an extremely durable fly that mimics the emerger stage of an insect's life.