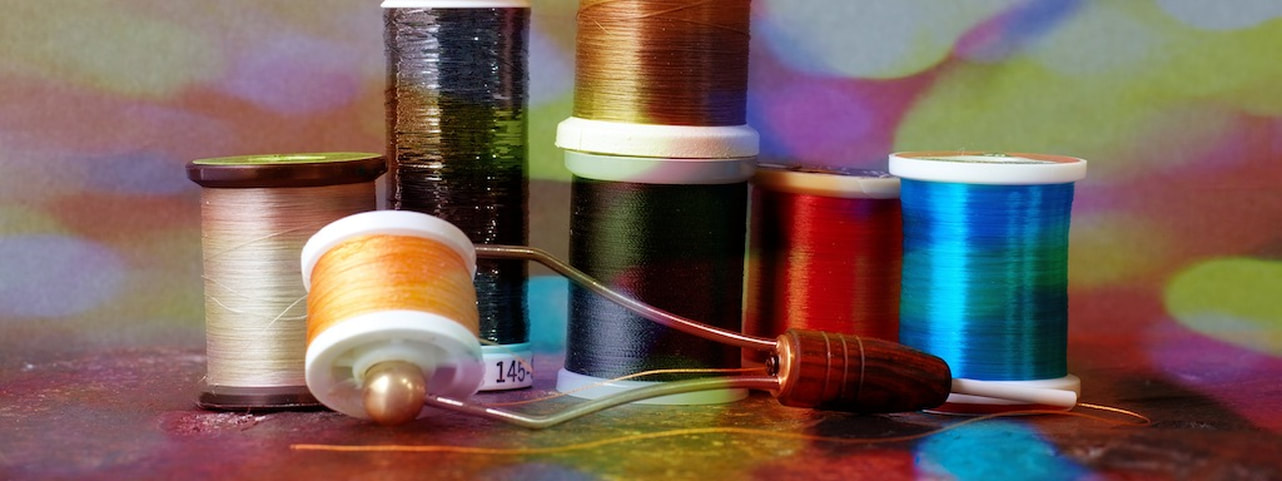
Working with thread
What you will need:
1. Hook of choice
2. Thread (preferably two colors)
3. Permanent Marker
What you should already know:
1. You should know the properties of the thread you are working with. How strong can you tug before it breaks? Is it formed by multiple twisted strands or single filaments? If twisted, which way?
2. Proper positioning of the hook in the vise jaws
3. How to attach thread to hook
4. How to finish the fly with a whip finish or half-hitch
What you will learn:
1. Tying a single layer thread base and double layer thread body
2. Tying a smooth body and a twisted thread body
3. Ribbing a body with thread
4. Tying a two-toned thread body
1. Tying a single layer thread base and double layer thread body
2. Tying a smooth body and a twisted thread body
3. Ribbing a body with thread
4. Tying a two-toned thread body
Are you ready to begin lashing about on hooks? Before you begin make sure you have studied Lesson #1. You should now be comfortable with starting the thread on the hook and finishing the fly with either a whip finish or half-hitch. If not, return to lesson #1. Each lesson from here on out will assume that you are comfortable with the previous lesson or lessons. This is tying in an "evolutionary" manner. Each lesson will evolve from the previous lesson by adding to the foundational knowledge you already know. Skipping about will only bring frustration.
The following lesson will introduce you to working with your thread. You will see some of the things you can do with thread alone. While working through the lesson concentrate on keeping a constant thread tension at all times. This helps to ensure that each wrap is like the others. It is the basis of consistency. Consistency is a very important part of becoming good at tying. When you tie a dozen flies of the same pattern and size, you want them to to be the same in structure and appearance. So keep a constant tension. I always tell my students to try and tie at an amount of tension that is just before the breaking point of the thread. This will be different for every kind of thread. Practice with your thread. Start it on a hook. Pull until it breaks. Do this a few times and you will get to know it's breaking point. Good tension is very important to tying a durable fly. Pay careful attention to each wrap. Make sure they are neat and touching. Try not to leave any big gaps. Also, do not keep a lot of thread extended from the tip of the bobbin when you are working with it. About an inch is a good amount. The more thread extended from the bobbin tip the less control you will have over placement of individual wraps. There are times when you may need to release the bobbin thread in order to work on an area of the fly. Don't fret, most bobbins are of sufficient weight to keep the thread from unraveling. Just carefully let the bobbin dangle below the hook. To continue wrapping, grasp the dangling bobbin without putting slack to the thread and continue your tying.
The following lesson will introduce you to working with your thread. You will see some of the things you can do with thread alone. While working through the lesson concentrate on keeping a constant thread tension at all times. This helps to ensure that each wrap is like the others. It is the basis of consistency. Consistency is a very important part of becoming good at tying. When you tie a dozen flies of the same pattern and size, you want them to to be the same in structure and appearance. So keep a constant tension. I always tell my students to try and tie at an amount of tension that is just before the breaking point of the thread. This will be different for every kind of thread. Practice with your thread. Start it on a hook. Pull until it breaks. Do this a few times and you will get to know it's breaking point. Good tension is very important to tying a durable fly. Pay careful attention to each wrap. Make sure they are neat and touching. Try not to leave any big gaps. Also, do not keep a lot of thread extended from the tip of the bobbin when you are working with it. About an inch is a good amount. The more thread extended from the bobbin tip the less control you will have over placement of individual wraps. There are times when you may need to release the bobbin thread in order to work on an area of the fly. Don't fret, most bobbins are of sufficient weight to keep the thread from unraveling. Just carefully let the bobbin dangle below the hook. To continue wrapping, grasp the dangling bobbin without putting slack to the thread and continue your tying.
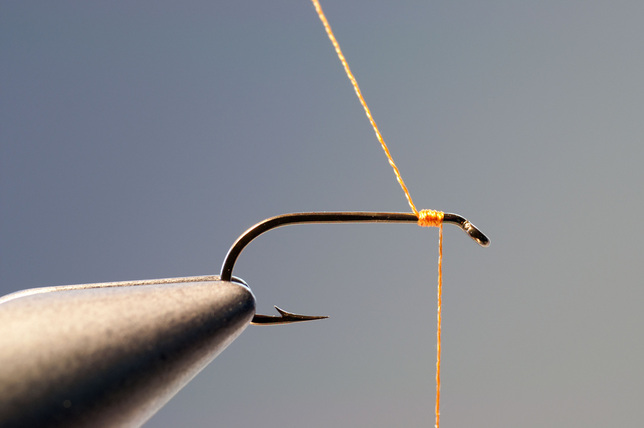
Start by attaching your thread to the hook as described in lesson #1 (5a).
NOTE:
I am using Pearsall's gossamer silk thread for this lesson. It is about a 6/0 size thread. The thread is made of 3 twisted ropes of pure silk. The ropes are twisted in a clockwise direction. Most threads today are in a counter-clockwise direction. I chose this thread as it is good at showing the twist and structure for this demonstration. Silk also has a very nice sheen to it. If I am tying flies with only thread bodies, I always prefer silk for this sheen and translucence when wet.
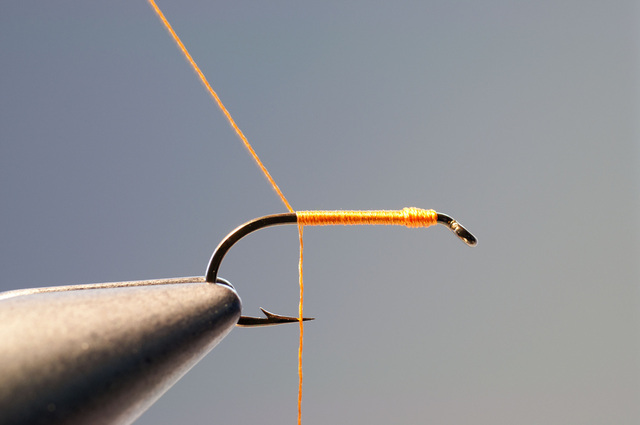
Keeping even tension on both the bobbin hand and the tag hand, proceed to make even touching wraps of thread towards the rear of the hook, Tying in the tag as you go. You can use the tag end of thread as a guide. Allow each wrap of thread to come in contact with the tag and "slide" down into position against the previous wrap. Again, try to keep wraps even and smooth. Stop at a point on the hook shank somewhere directly above and between the point and the barb of the hook. You may or may not want to trim off the tag end of the thread at this point. This finishes a single layer thread base. It forms a thread base along the hook shank in order to tie in other materials. The next few images will show six options to consider from this point.
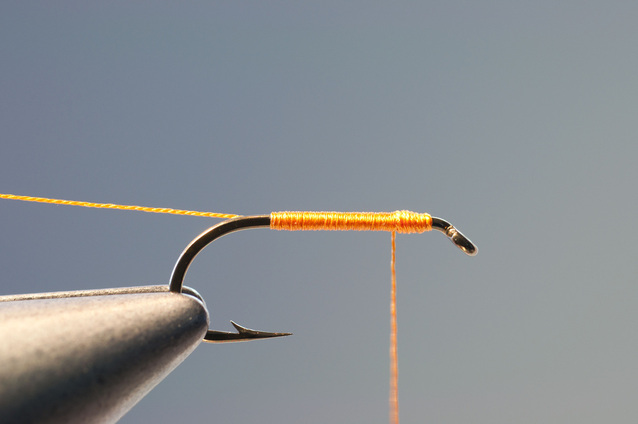
Option 1. Smooth thread body
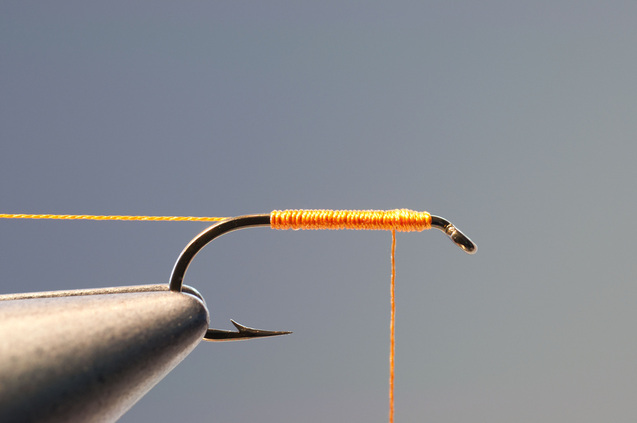
For a smooth bodied fly, you can untwist the thread (some threads will naturally wrap flat and smooth) and return forward in smooth ever-so-slightly overlapping wraps. This creates a very smooth, thin body that has some sheen to it.
Option 2. Twisted thread body
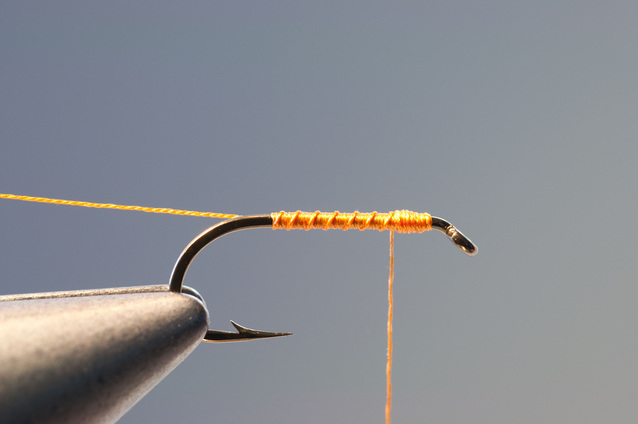
Another option for a more ribbed effect is to tighten the twist of the thread at the rear of the shank and proceed to wrap forward as in the previous step. Notice in the picture as compared to the smooth body above that the body appears a bit thicker and the that the body now looks segmented. This also adds depth to the body structure.
Note:
Twisting and untwisting your thread will have applications later on in the securing of certain materials to the fly.
Option 3. Ribbed body
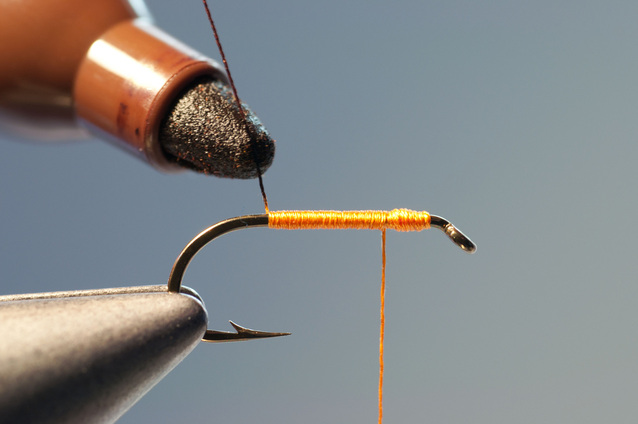
Yet, another option from the rear of the hook shank is to tighten the twist on the thread and return it forward in what is call "open wraps". This gives the body a "ribbed" look. We will see later that many materials are used to "rib" a fly body and ribbing is often found as a part of the fly pattern. Vary the amount of wraps for the effect you want. It is common, for aesthetic value, to use an odd number of wraps (3,5,7). However, I don't think the fish will care. Ribbing is often used for attractive and imitative purposes on flies. Ribbing like this casts distinctive shadows adding depth and structure to the fly body.
Option 4: Ribbed body (colored)
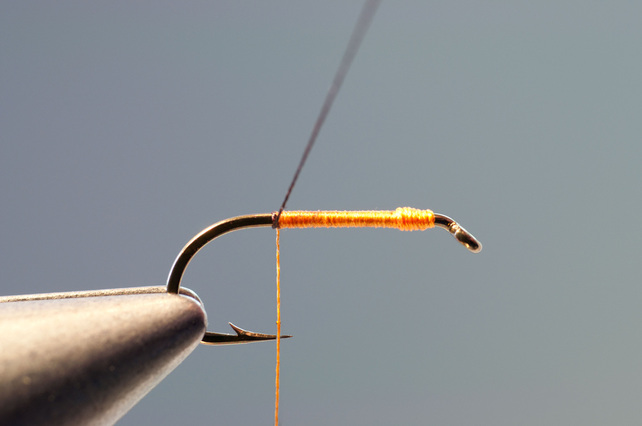
Here is another direction to go for a colored rib using the same thread. Wrap a smooth body for the base, untwisting the thread and moving it forward as is shown in option #1 above. Then, with a permanent marker, color a section of the tag end of thread.
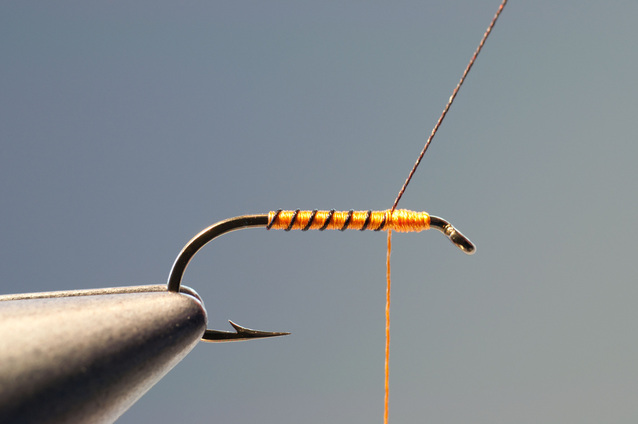
Twist tightly the colored tag end of thread and wrap forward in open wraps. Once you have met up with the bobbin end of the thread make a couple tight wraps of thread over the tag end to secure it to the fly body. You can then closely trim the tag end. As you can see here I have chosen a dark color thread. This adds the concept of "contrast" to fly body. Contrasting shades of color can play and important role in the productive ability of an artificial fly. Contrasting colors can at times be an essential element in attracting the fish's attention or matching a particular stage in an insects life cycle.
Option 5. Two-toned colored thread body
This is another good option to introduce contrast as well as distinguishing the specific parts of the insect or just adding attractive influence to the fly with bright colors. Start by coloring the tag of end of thread as in Option #4. Make forward touching wraps with the colored tag end of thread. Make these wraps over the bobbin thread, tying it down as you go.
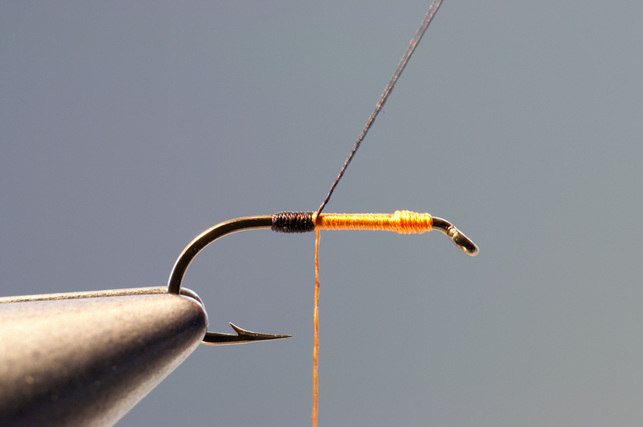
Continue to make forward wraps with the colored tag end then stopping at the point you wish to change the color. At this point, hold the tag end still and start making wraps with the bobbin end over the colored tag end. The picture shows the stopping point and one wrap of the bobbin end over the tag end to secure it.
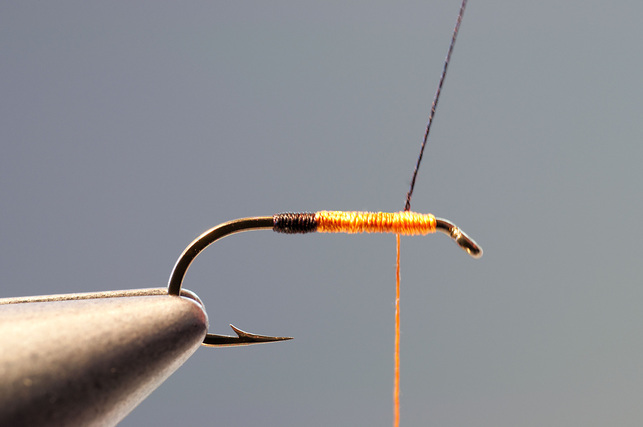
Continue on with the bobbin end making tight wraps forward over the tag end of thread. Once you have reached your preferred stopping point you can cut the tag end. This creates a two-toned and rather smooth transition of the body where the two colors meet. There are a lot of ways you could take this. Light back/dark front, alternating colors all the way up the body in even segments or wide/thin, wide/thin segments. This method is often used to create a pattern on bodies that suggest a bee.
Option 6. Two-colored thread body
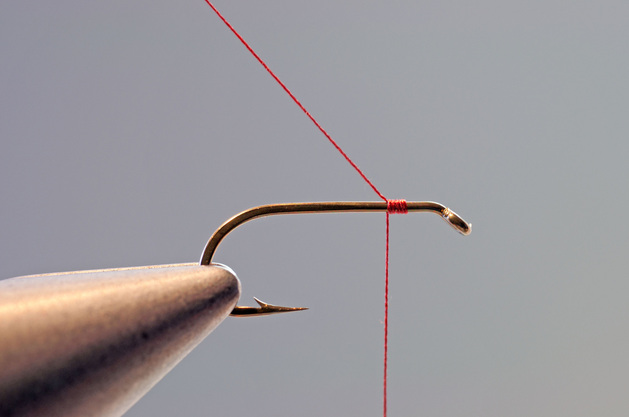
Sometimes a marker just won't be able to give you the color you want. If this is the case you can work with two different threads. Start with one thread color attached to the hook. Start this thread a little further back on the hook shank than you normally would if working with one thread. Do not wrap forward with the attachment but continue to wrap smooth wraps to the rear of the hook. Stop a little shy of where you want the body to end (see where the red stopped below) Return to the front of the hook laying a smooth body as in option #1. At this point you will want to place a half-hitch around the hook and trim your bobbin thread.
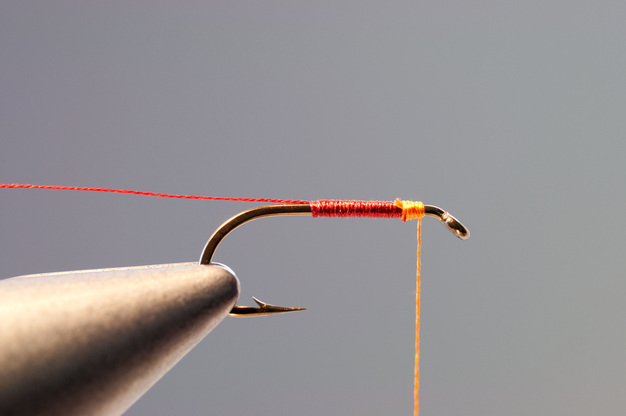
Now attach your second color (orange) of thread at a point behind the hook eye where your attachment process will slightly overlap the first thread. Attach the orange color with the preferred method (wrapping back 4-5 wraps then reversing direction and wrapping forward 5-6 wraps. Now cut off the tag end of this thread. From here you have couple options. The next two photos will describe two options.
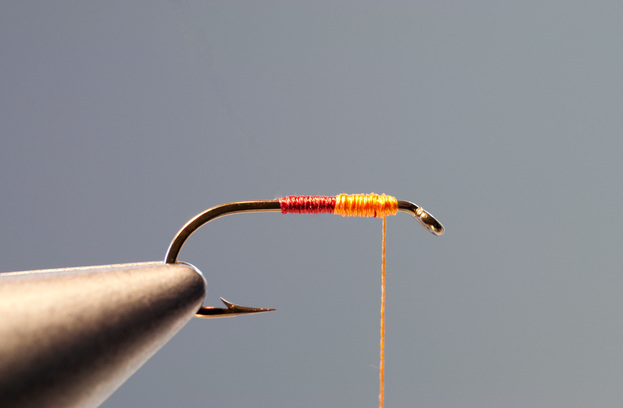
You can wrap the orange thread a certain distance back and then forward again to form a two-toned body. Note that this is not an even transition between colors as in option #5 above. This will give you a nice taper into a bit bulkier thorax or head area which is common to many immature aquatic insects. You can trim off the tag of the first (red) thread to finish the body.
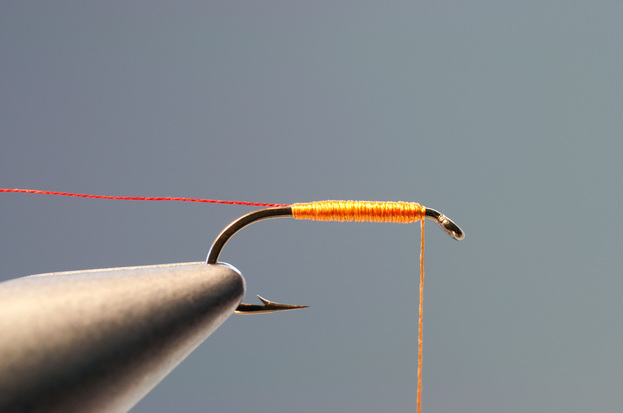
If you don't want the two-toned appearance but are after a ribbed look instead, then wrap your orange thread to the rear of the shank and then return to the front. Keep the wraps tight and smooth and try to build a smooth taper at both ends so the body takes on a "cigar" shape.
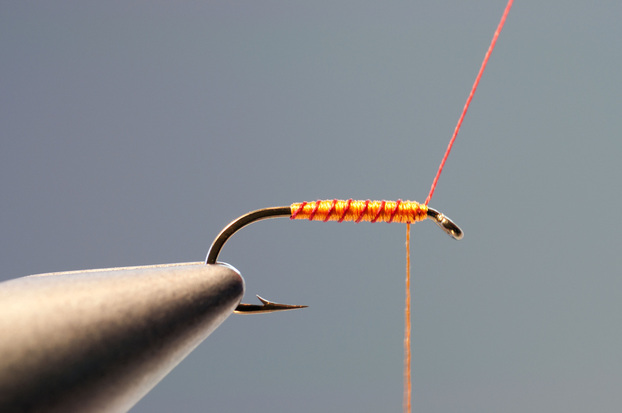
Now you can follow with the tag of red thread to create the ribbing. Wrap forward and secure with the orange thread which is still attached to the bobbin.
THE END
I am going to end Lesson #2: Working with Thread here. This is a good start to get you on the road to quality thread control. Work through some of the above exercises. Practice tying the thread at the tightest strength you can without breaking it. Work with wraps that are both smooth and twisted. Practice keeping each wrap consistent. Practice making thin smooth bodies as well as wrapping back and forth to build smooth bodies with a little bulk to them. In no time you will get to know the tying properties of your thread. You may or may not like them. There are a lot of choices to try out there. In time you will find the thread that best suites you. Smaller flies will bring about a bit more difficulty. They simply require more thread control. I suggest you practice on a #10-#12 hook which is not too large or too small. Gradually work your way onto smaller hooks. By concentrating just on thread control and not a bunch of other materials, and not a bunch of other materials at
NOTE:
This is a great lesson to really get a handle of the knots to finish flies. Work on the half hitches and especially the whip finish. It is much easier to practice them on flies that are not full of materials that could get in the way.
Now you might be thinking... sitting there and playing with thread is boring. It surely doesn't have the involvement of a full dress salmon fly, but with a hook, thread and a few markers you can create quite few flies that will catch fish. Think aquatic worms, and the larvae of chironomids, flies and caddis. Below I have included three patterns that I have found to be productive fish catchers for me. Adjust colors, shapes and hooks to your liking.
Flies to try from this lesson
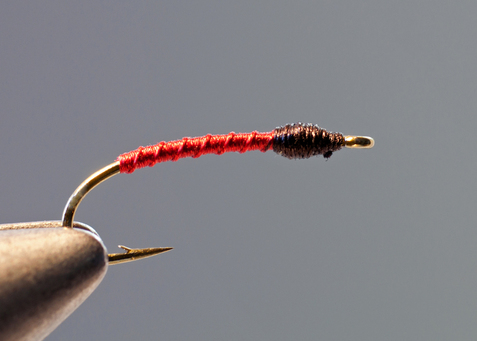
Chironomid Larva
Hook: heavy wire choice. #8-20.
Thread: red
Rib: twisted thread
Abdomen: thread
Thorax: thread colored with dark brown marker
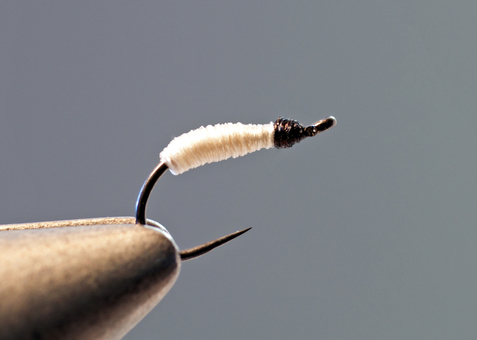
Black Fly Larva
Hook: curved or caddis choice. #16-#20
Thread: white thread
Body: thread built up in the rear with a gradual taper towards the eye. Some describe this as a bowling pin shape.
Head: thread colored with black permanent marker
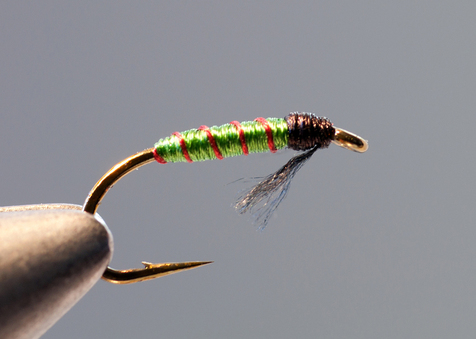
Caddis Larva
Hook: shorter heavy wire, choice. #8-#20.
Thread: green and red thread
Rib: red thread
Abdomen: green Pearsall's silk thread
Thorax/Head: green thread colored with brown permanent marker
Legs: tag end of thread combed out and colored with brown permanent marker
Note: You don't always have to wrap the ribbing material in the same direction. I have chosen to wrap in a "counter" direction on this example. Practice ribbing both directions.
